Jacob's Programming Explosions

Managing jQuery Animations With Promises

This post is about managing asynchronous functions in jQuery

The other day, I was at the grocery store with my wife when a graphic designer friend of mine texted me asking for some jQuery help for his website.

text conversation with my friend

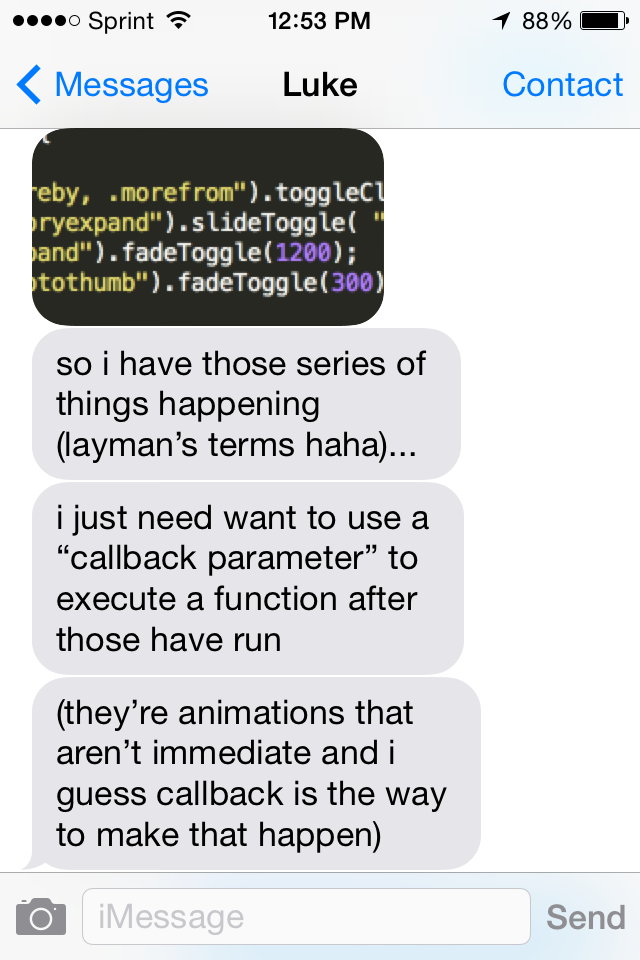
Basically, he was doing a couple of jQuery animations and had another animation he wanted to happen only once the others were complete. He couldn’t figure out how to make the last animation wait until all the others were complete. If you are familar with jQuery at all this will make sense to you (and you may want to jump down to the next section). Maybe you have also had this problem. In case you aren’t familar, the problem my friend had was due to the fact that jQuery animation functions (and AJAX funtions!) run asynchronously. For instance:

1
2
3
$('.green-div').hide();
$('.green-div').fadeIn(1000);
$('.green-div').css({'background-color': 'blue'});

In this example the initially hidden green div will take 1000 miliseconds to fade in and its color will be changed to blue. However, you will not see the color of the div change from green to blue. It will fade in as blue. This is because line 3 gets called before line 2’s fadeIn function has completed. This is because .fadeIn() executes asynchronously. Meaning, it gets called and starts doing its thing, but the program does not wait until it has finished before evaluating the next line of code. So again, the reason you would have never seen the div turn blue is because line 3 executed very quickly while line 2 took a second.

For situations as simple as this one, the solution would be to pass a callback function to .fadeIn(). Like so:

1
2
3
4
$('div').hide();
$('div').fadeIn(1000, function(){
  $('div').css({'background-color': 'blue'});
});

This time, we pass an anonymous function to .fadeIn(), which gets called only once .fadeIn() has finished its job. So here we would see the div fade in, then it would snap to blue.

Okay, so what if you have three functions you want to happen sequentially? What if between fading in the div and turning it blue we also wanted to slide it down 50 pixels? Things get a little stickier. But as you may know, we could just pass a callback to the function we want the slide to happen after:

1
2
3
4
5
6
$('div').hide();
$('div').fadeIn(1000, function(){
  $('div').animate({'margin-top': '50px'}, 300, function(){
    $('div').css({'background-color': 'blue'});
  });
});

This works, but we are nearing the gates of Callback Hell. Even in this contrived, simple example our code has become messy looking. And messy looking code is hard to maintain. We could have at least used named functions…I mean c’mon.

Getting Fancy

So back to my friend’s problem. He had some animations he wanted to do, and another animation he wanted to happen only after all the others were finished. The catch is that he wanted the initial set of animations to happen asynchronously and he didn’t know how long the animations would take to finish. Of couse, getting the first set of animations to happen asychronously took no effort; he just called them one after the other.

The real problem was knowing when all of the animations were done. This situation is a lot less linear than the scenario we went over above. We can’t simply pass each animation as a callback for the previous one, as we want the batch of animations to run concurrently. Also, we cannot simply pass the final animation as a callback, since we don’t know which animation will be the final animation. We need a way of saying, “hey, when all of these animations are done, do this animation.”

This is where promises save the day!

Promises help us manage asynchronous operations and their callbacks. Let’s look at an example based on my friend’s problem. For this example we have a <button>, three <div>s and a <p>. When the user clicks the botton, we want to perform a unique animation for each of the <div>s (concurrently!). Once those are all done, we want to append the <p> to notify the user that they are awesome. To accomplish this, we are going to use jQuery’s .when() and .done() functions. I’ll explain more below, but for now, just note that jQuery’s animations (as well as AJAX functions) return a promise.

1
2
3
4
5
6
7
8
9
$('button').click(function(){
  $.when(
    $('.div1').animate({'margin-left': '40px'}),
    $('.div2').animate({'margin-left': '80px'}),
    $('.div2').animate({'margin-left': '120px'})
  ).done(function(){
    $('p').append('You are awesome!');
  });
})

When the button is clicked, we fire the three animations within .when(). Once all three are completed, the function provided to .done() is called. You can check out a live demo here.

This not only solves our problems, it is also beautiful!

I wish I could say that I immediately knew using .when() and .done() was the solution my friend was looking for and that I texted him that while I was wandering up and down the aisles at Associated, but I think my initial reaction was something like, “Hm…it should be easy. Crap, how DO you do that…” The embarrassment of lacking a solution was all the motivation I needed to dive in to the wonderful world of deferreds and promises. And I’m really glad I did, because they’re awesome.

Getting Technical

As I hinted earlier, jQuery’s AJAX functions can also make use of .when() and .done(), as well as a function called .then(). The .done() and .then() functions are fairly similar, and replacing .done() with .then() in our code above would actually give us the same result. One detail to note is that .done() can be passed multiple functions, or an array of functions. Passing multiple callbacks to done is nice if you want some stuff to happen asynchronously. If you have some things you want to do linearly, you can chain .done()’s onto each other. ie: $.when(animateSomething, animateSomethingElse).done(doThis).done(thenThis);

So what is really going on when you use .when() and .then()? Well, .when() is waiting until the state of the promises passed to it (in our case we passed functions that returned promises) are all ‘resolved’ (as opposed to ‘pending’ or ‘rejected’). Once this happens, the .done() callbacks are fired. For a deeper understanding of promises (jQuery’s implementation, specifically), check out the links below.

I’d like to write more technically about promises (and deferreds) in jQuery in the near future. They are especially powerful for managing AJAX transations. So stay tuned!

Resources

http://blog.mediumequalsmessage.com/promise-deferred-objects-in-javascript-pt1-theory-and-semantics http://jquery-part2.codeschool.com/levels/6/challenges/1 https://www.youtube.com/watch?v=zD-JoRDk8ig http://www.htmlgoodies.com/beyond/javascript/making-promises-with-jquery-deferred.html http://api.jquery.com/deferred.promise/ http://api.jquery.com/deferred.done/

Going, Going, Gon

This post is about passing variables from your rails controller to your javascript files.

Recently, I was working on a rails project involving some javascript on the front end. Javascript is fun, so I was excited to get started on it. The feature was going to be a set of charts (using the chart.js library) populated with data relating to a group of users. It didn’t take me long to figure out that while it is super easy to pass data from a controller to a view, I didn’t actually know how to pass anything from my controllers to my javascript files. I tinkered around for a bit without any success. At one point I started to consider the ridiculous idea of firing an AJAX GET request back to my controller on page load using JQuery to get what I needed, since I already knew how to do that. But that felt really dirty, and I’m a little embarrassed to even mention it.

Then my friend Amy told me to use Gon.

Gon? It’s a sweet gem for passing variables from your rails controller to your javascript files. Just what I needed! Gon is incredibly easy to use. I’ll show you.

  1. First, add Gon to your Gemfile (and run bundle install). Now add <%= include_gon %> in the <head></head> section of application.html.erb. Now you are ready to get down to business!

  2. In the appropriate controller and action, we’re going to create a variable for the data you want to pass to the js file. Here I’m in groups_controller.rb in the show action. This action is responsible for a single group’s page (ie example.com/groups/3). This action renders /app/views/groups/show.html.erb, inside of which I include my javascript file via a javascript_include_tag (/app/assets/javascripts/groups_show.js). All you need to do is name your variable like so: gon.your_variable_name.

groups_controller.rb

1
2
3
4
def show
  @group = Group.find(params[:id])
  gon.group_name = @group.name
end
  1. That’s it! gon.group_name is now available in my groups_show.js file.

groups_show.js

1
2
var groupName = gon.group_name
// That was really easy.

As you can see, Gon is a super useful and easy way to pass data from you controllers to your javascript files.

Error Handling in Ruby

Errors. You’ve seen ‘em. Hundreds…Thousands…and that’s just today! You might think errors are bad. But actually, errors are really good. It’s bugs that are bad. Errors are good because they give you clues about why your program doesn’t work, instead of leaving you completely on your own to trace down what is in many cases only a measely typo. Errors may be frustrating, but they are very good at telling us where and how our program crashed. Reading error messages intelligently is important, but you aren’t constrained to only read errors after they terminate your program, you can actually tell your program how to respond to different types of errors! This is called error handling.

If you are anything like me, you’ve probably run into some code in Ruby that you know has to do with errors, but you have no idea what they mean or why they are there. I’m talking about stuff that looks like:

1
2
3
4
5
6
7
8
9
begin
  raise . . .
rescue . . .
  . . .
else
  . . .
ensure
  . . .
end

begin, raise, rescue, ensure, what are all these about? I was wondering that too. So I did some reading and played around a bit. It’s all really simple, but for a long time it was easy for me to ignore these blocks of code and be on my way. But I was missing out. So let’s break that begin/end block apart.

First though, let’s lay some ground work here for our understanding of errors and exceptions in general. What should we know about errors and exceptions? Well, errors are classes that are all descendants of the Exception class. The difference between an exception and an error in Ruby is (in my understanding) very subtle, so we won’t go into that. You can safely think of them as synonymous at a general level. I’ll only be using the term error from this point on.

We should also note that when an error occurs in a program, this is known as an error being raised. Ruby automatically raises errors whenever your program meets the conditions of any of Ruby’s Exception class or it’s descendants. So if you try "x".pop, Ruby will raise the NoMethodError. You can manually raise an error anywhere in a program by using raise, like so: raise RuntimeError, "This is a custom message". Were you to leave that line of code out in the open, it would crash your program every time. If the program does not provide any code for dealing with such an error, the program will terminate. You can however provide your program with instructions concerning what to do when a certain type of error is raised as to prevent the program from terminating. This is known as error handling, which brings us the the begin/end block.

A begin/end block is used to handle errors from within a program. Say we have a program that takes user input and then applies some logic to it in order to yield the program’s final output. This is all well and good until the user pulls a fast one and supplies shoddie input, which is sure to break once we try applying the logic to it. The program crashes. Wouldn’t it be better if we anticipated this kind of tomfoolery in such a way as to have our control flow handle the error that bad input would raise and prompt the user for input again if such was the case? That’s what error handling, and more specifically the begin/rescue block is for. Let’s look at a begin/rescue block in its simplest form.

1
2
3
4
5
begin
  raise StandardError, "This is my optional custom error message"
rescue
  puts "I just delt with that error."
end

Here we raise a StandardError and supply it with an option custom error message. As we learned before, this would normally terminate the program, as errors do. But within a begin/rescue block with a rescue clause, we are given the opportunity to fix whatever caused the error and continue with the program. If you want to make a fix and start from the top of the block just to make sure it worked you can use retry at the bottom of the rescue clause. Maybe that example seems weird to you because I raised an error for seemingly no reason, so let’s do it again where an error is raised based on a conditional statement.

1
2
3
4
5
6
7
8
9
10
11
begin
  days = %{sunday monday tuesday wednesday thursday friday}
  puts "Please enter a day of the week"
  input = gets.strip.downcase
  raise StandardError, "You did not follow the instructions." unless days.include?(input)
rescue
  puts "Okay, I'll pick a day for you. Monday."
  input = "monday"
end

# program uses input for stuff down here.

In this example we ask the user for input and we expect it to be a day of the week. The StandardError is only raised if the conditional is not met, in which case we jump to the rescue clause. Here we tell the user what it is and choose monday on their behalf. This way, we are able to continue the program with a valid value for input that will work later on in the code. We could just put retry in the rescue clause in order to give the user another shot(s).

There are two more components of the begin/rescue block worth touching on quickly. First is the else clause. This is simple what will run if no error is raised.

1
2
3
4
5
6
7
begin
  # Code that may or may not raise an error
rescue
  # Error handling code
else
  # This runs only if no error gets raised.
end

Simple enough. The last piece is ensure. This one is easy too. Whatever is in the ensure clause will run at the very end of the begin/rescue block. It doesn’t matter if an error was raised or not, or if there was an else clause or not. It just always happens, and it happens last. Like so:

1
2
3
4
5
6
7
8
9
10
11
a, b = 1, "x"

begin
  a + b
rescue TypeError
  puts "You can't add those types of objects together"
else
  puts "a + b worked fine, no rescue needed"
ensure
  puts "I print every time no matter what"
end

All in all it’s pretty simple. But why would you want to write error handling code in your programs? Well, you certainly don’t always want to. It should only be used for exceptional cases. And granted, the examples I used were too simple to actually warrant error handling. My intention was to focus more on the basic syntax and mechanics of error handling than the scenarios in which it is appropriate. Hopefully this article help you understand the very basics of handling errors in your Ruby programs.

Here are some resources I found particularly helpful:

General reading on exceptions: http://www.tutorialspoint.com/ruby/ruby_exceptions.htm http://ruby.bastardsbook.com/chapters/exception-handling/ http://rubymonk.com/learning/books/4-ruby-primer-ascent/chapters/41-exceptions/lessons/92-handling#solution4253

When/how to use rescue for handling exceptions: http://daniel.fone.net.nz/blog/2013/05/28/why-you-should-never-rescue-exception-in-ruby/ http://rubymonk.com/learning/books/4-ruby-primer-ascent/chapters/41-exceptions/lessons/93-throw-and-catch

Throw and Catch: http://rubylearning.com/blog/2011/07/12/throw-catch-raise-rescue-im-so-confused/

Expressive, Not Impressive

I don’t know if you’ve heard, but there is a terrible rumor about programming going around. If you haven’t heard it yet, you will soon. It’s really making the rounds. And when you hear it, you’ll be tempted to believe it and spread it yourself. But please, don’t fall for it. You’re better than that. I’m going to tell you the rumor, because I think you can handle it. But again, don’t buy in. Ready? Okay then, here it is:

“Programmers write code for computers.”

Pretty awful, isn’t it? I mean, this is a real atrocity! No? You don’t think so? I think I know what you are thinking. On the surface it seems to be true and completely sensible. After all, the whole reason programming languages were invented was so we would have a way to tell computers to do stuff. You know, speak to them in a way they can understand. Be that as it may, programmers are not, I repeat not people who write code for computers. In actuality, Programmers are people who create programs. Think I am being overly dogmatic? Well I’m not. The difference is not a matter of mere semantics, but of an underlying understanding of what your goal as a developer really is. The side of this divide you fall on will dictate a great deal about the programs you create and the code you write to create them.

When writing code (as a programmer, developer, software engineer, or whatever you want to call yourself), it is very important for your computer, and other computers, to understands it. Yes, for sure. However, it is even more important for people to understand it. I’m seriously not making this up. Just look at this quote from the renowned Hal Ableson:

“Programs must be written for people to read, and only incidentally for machines to execute.”

Hopefully you believe me now that I pulled Ableson gun out. But you might still be wondering what this really means or has to do with the code you write. It’s about writing expressive code. What is expressive code? Take a guess. It’s code…that…is expressive. Yep, that’s it. Expressive code is just code that is intentionally written to be easily understood by humans. I like to write in Ruby, which is a very expressive language. It is lacking in curly braces, semicolons, and boilerplate code other languages are known for. But just because Ruby is expressive and I write in Ruby does not mean I am writing expressively. It just means I have a head start. Expressive code can be written in any language, because it an approach to writing and organizing code that transcends the mere syntax of the language you are currently constrained to obey.

Let me explain what I mean. We tend to think computers are rigid in their requirements and that people just have to put up with whatever code it takes to make a program run or a test pass, no matter how ugly or confusing to look at it may be. I won’t say this is completely untrue. There is a level of syntactic precision computers demand in order to work (because they are stupid and they don’t know any better). But in a sense, it is computers that are flexible and people who are limited in what code or syntax they can understand. You can write a program, or even a simple method, nearly endless ways. Your computer doesn’t have a preference on how you write the code, as long as it works. People on the other hand, we have preferences. And we do care how a program it written. We like being able to quickly look at a method and be able to see what it does. Writing code that keeps this in mind is what it means to write expressive code. I think we have reached example time.

So let’s look at some code. Say we have an array containing hashes representing bands:

1
2
3
4
5
[
  {"The White Stripes" => {"The White Stripes" => "1999", "De Stijl" => "2000", "Elephant" => "2003", "Get behind Me Satan" => "2005", "Icky Thump" => "2007"} },
  {"Fleet Foxes" => {"Fleet Foxes" => 2008, "Helplessness Blues" => 2011}},
  {"Jonsi" => {"Go" => "2010"} }
]

Say we want to print every album name to the screen. You could write it like this:

1
2
3
4
5
6
7
8
9
10
11
12
13
a = [
      {"The White Stripes" => {"1999" => "The White Stripes", "2000" => "De Stijl", "2003" => "Elephant", "2005" => "Get behind Me Satan", "2007" => "Icky Thump"}},
      {"Fleet Foxes" => {"2008" => "Fleet Foxes", "2011" => "Helplessness Blues"}},
      {"Jonsi" => {"2010" => "Go"}}
    ]

a.each do |v|
  v.each do |w, x|
    x.each do |y, z|
      puts z
    end
  end
end

To the computer, this is completely valid code and will output the desired results, which would be:

The White Stripes
De Stijl
Elephant
Get behind Me Satan
Icky Thump
Fleet Foxes
Helplessness Blues
Go

But how would you feel if you were tasked to update/fix/optimize some code and you ran into that cryptic mess we just saw? Worse yet, what if you lacked the luxury of seeing the definition of the array being iterated over at all? Effectively leaving you with the following:

1
2
3
4
5
6
7
a.each do |v|
  v.each do |w, x|
    x.each do |y, z|
      puts z
    end
  end
end

I would be completely in the dark if this was all I had to go on. All I would know from looking at the above code would be that some multi-dimentional collection was being iterated over and eventually an inner value is printed. This is nearly useless and will force me to stumbled around the source code files trying to figure out exactly what that collection is. And this is just a simple example. The more complex your objects and methods get, the more lost you and others will become when looking at your code.

Self Documenting Code (naming things)

So how could we write that procedure to be more expressive? There are a few important principles for writing expressive code. One of the most important ideas is called self documenting code. One key convention for self documenting code is giving variables meaningful and accurate names. Sound easy? Well actually, it can be pretty tough sometimes. You might be on a roll pumping out your code, not needing any help remembering what’s what, and definitely not wanting to slow down just to think of what to name a variable. But it will come back to bite you and anyone who needs to work on the project if you don’t take the extra set of seconds to come up with a decent name. Let’s rewrite the previous example using simple, descriptive names for our variables:

1
2
3
4
5
6
7
8
9
10
11
12
13
music_library = [
      {"The White Stripes" => {"1999" => "The White Stripes", "2000" => "De Stijl", "2003" => "Elephant", "2005" => "Get behind Me Satan", "2007" => "Icky Thump"}},
      {"Fleet Foxes" => {"2008" => "Fleet Foxes", "2011" => "Helplessness Blues"}},
      {"Jonsi" => {"2010" => "Go"}}
    ]

music_library.each do |band|
  band.each do |name, albums|
    albums.each do |year, album|
      puts album
    end
  end
end

Wow! Now I can see what’s going on! This is much more readable, and literally the only difference is the names of the variables. The computer doesn’t care, but I sure do. I might not know exactly how music_library is structured if I don’t know where it was defined, but at least I know that it is a music library. And in the first place, it was much easier to write the above code than the first version we looked at. I didn’t have to keep track of the music list’s structure in my head. One more thing, I should probably have wrapped that code into a method and given that a good name too.

1
2
3
4
5
6
7
8
9
def library_albums(music_library)
  music_library.each do |band|
    band.each do |name, albums|
      albums.each do |year, album|
        puts album
      end
    end
  end
end

There we go. Everything makes sense now. That is an example of self documenting code. If you are like me, you look at this example and think, “Yeah, I’m gonna start making my code more readable. It’ll be great.” However, minutes later you will find yourself taking shortcuts, sacrificing clarity to save a line of code or two. Then you start making excuses for it, like, “this is 3 lines shorter, so it must be more expressive.” Or you might think about how impressed others will be when they see you chain six methods together on one line. And who doesn’t want to be impressive? You don’t, that’s who.

There’s a really great talk called The Myth of the Genius Programmer by a couple of guys from Google (Ben Collins-Sussman and Brian Fitzpatrick) in which they talk about some destructive habits programmers fall into in order to appear clever to their peers. The bottom line is that we like to look smart. The problem is that when we give our priority to making our code look smart over making our code easy to understand, we hinder our ability to collaborate with other developers. This hinders the project and our own continued growth. So always be on guard not to get carried away while refactoring your code. Refactor towards simplicity and clarity, not mere brevity. In other words, try to be expressive, not impressive.

There are many other practices for writing expressive code that I have not gone into here, such as the Single Responsibility Principle. I recommend this blog post on the subject of expressive code. His examples are in JavaScript. I found it a very helpful place to start.

tl;dr

Expressive code is code that is intentionally written to be easy for people to read and understand. One important aspect of expressive code is naming variables and methods descriptively and accurately. Remember, a program with the fewest (or most!) lines of code is not always the best. Don’t try to make yourself look smart by making a program hard to read. Be expressive, not impressive.